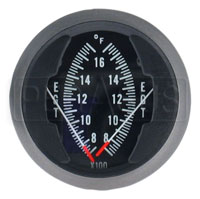
Westach EGT Gauges are popular in racecars with total-loss electrical systems or magneto ignitions because they require no external power source. They are also very simple, reliable instruments. If they stop working, it is usually quite easy to find the problem. All you need is an Ohmmeter. The following troubleshooting guide is adapted from the Westach catalog and applies to Westach self-powered EGT and CHT gauges. |
Check the Easy Things First
1. Check that all connections are clean and secure.
2. Try reversing the connections.
3. If one side of a dual gauge is not reading, try swapping senders from one side of the gauge to the other (then try repeating Steps 1 and 2 if necessary).
If any of these solve the problem, no further action is needed.
In the case of the dual gauge:
If the non-reading side has switched to the other side of the gauge, proceed to Check the Senders and Wiring below.
If the non-reading side still does not read, you can go straight to Check the Gauge below.
Check the Senders and Wiring
1. If an extension or adapter cable is used, disconnect the cable from the sender and from the gauge and check the resistance of each wire in the cable. Each wire should have less than 0.5 Ohms resistance regardless of length.
2. Disconnect the sender from the gauge and check the resistance of the sender.
"Type K" EGT thermocouples should have 0.625 Ohms resistance per foot (a standard 4' EGT probe will have 2.5 Ohms resistance).
"Type J" CHT thermocouples should have 0.375 Ohms resistance per foot (a standard 4' CHT probe will have 1.5 Ohms resistance).
Note that these resistance values can be difficult to measure accurately. Be sure your Ohmmeter is zeroed and set to x1 range (if applicable).
Singificantly higher resistance values indicate a component that is failing. A reading of 10 Ohms or higher indicates a part that has failed.
Check the Gauge
Note: Do NOT apply voltage to the gauge! These gauges use microvoltage to move the needle. Applying more than 20 mV (CHT) or 40 mV (EGT) may ruin the gauge.
Disconnect the sender from the gauge and check the resistance of the gauge. Depending on the scale, the resistance should be between 8 and 20 Ohms. You should also notice the needle moving slightly when the Ohmmeter is connected.
Note that needle deflection during this test is only a seconday indication of gauge function. It should not be used to attempt to verify gauge calibration.
Significantly higher or lower resistance values indicate that the gauge has failed.
How do these things work, anyway?
A thermocouple measures the difference in temperature between the hot (probe end) and cold (plug end) of the thermocouple assembly. As the temperature of the hot end rises, a very small voltage is generated. This voltage is then used to move the needle in the Westach gauge.
If you have access to a very accurate voltmeter capable of reading millivolts...
| Westach CHT/EGT Probe Voltage Output | ||
|---|---|---|
| Temperature (° F) | Voltage Output (mV) | |
| CHT (Type J) | EGT (Type K) | |
| 100° | 0.72 | - |
| 200° | 3.69 | 2.87 |
| 300° | 6.72 | - |
| 400° | 9.81 | 7.36 |
| 500° | 12.90 | - |
| 600° | 15.96 | - |
| 700° | 19.04 | - |
| 800° | - | 16.58 |
| 1000° | - | 21.31 |
| 1200° | - | 26.03 |
| 1400° | - | 30.70 |
| 1500° | - | 32.90 |
| 1600° | - | 35.24 |
| 1800° | - | 39.67 |
The black wire on the probe is negative. The white wire on the probe is positive. The values in the table above apply regardless of cable length.
What if the temperature is just a little off?
As mentioned above, the gauge needle moves in relation to the difference in temperature between the hot end and cold end of the probe. One drawback to this arrangement is that it relies on an assumption about ambient air temperature.
Westach thermocouples and gauges are normally calibrated assuming 70°F ambient air temperature. If the cold end is colder than this, the gauge will read higher. The gauge will "think" there is a larger difference between the hot end and the cold end because it does not "know" that the cold end is so cold.
As a result, snowmobilers in 30°F weather will see temperatures approximately 40°F higher than the actual temperature. By the same token, racers might be surprised to see that on a brutally hot summer day, the engine seems to running about 30°F cooler than it did in the springtime. Granted, this is a very small error on an EGT gauge that reads to 1700°F... but this inherent error is something to keep in mind during temperature extremes.


